Sunday, 19 April 2015

Up-cycling a Vintage Suitcase Part II


So a few months ago I undertook a suitcase renovation, which you can read about here. I have a HUGE luggage obsession. Back when I lived in the UK and was shuttling between uni and home I had a little collection going- at uni I had a steamer trunk and at home two large suitcases and a small 'un. I was consequently banned from collecting more (so I acquired a vintage leather doctor's bag). It's a sickness!

This suitcase I actually found whilst walking a dog, (I say "a" dog because he is not mine). I dragged it home on a bus, tram AND metro then up the several flights of stairs to get to my apartment. This turned out to be the easiest bit!

Furthermore I decided to make a game of it, lets see how LITTLE I can spend on this project and see what happens- I ended up spending under 2 euro, so I think this was a success.

(The quality of photos vary as some were taken in the middle of the night (!) and some on my phone, some on my camera etc, so I apologize for the inconsistency...)

WHAT YOU NEED

Paint (spray paint or acrylic is what I used)
PVA glue, lots of
A few old brushes
Some paper to cover the outside (I used wrapping paper from ikea but I would recommend something better quality)
Something to decorate the inside, more paper or an old book, or decoupage papers- whatever!
Paper clips are useful
Scissors
Ruler
Pencil
Double sided tape was handy too
Jam jar lid (for putting the glue and paint on)
Protective sheet or covering
Maybe gloves depending on your paint (I had green hands for a while)
Craft knife/stanley knife


So I started with this rather ugly and plasticy suitcase, it had no handles and two holes in the front. It was fairly solid and had no smell (unlike the last one). As it wasn't made of leather I decided it would be perfect for decorating inside AND out. The last one was too pretty on the outside to do anything other than clean up- this one however is just not doing anything for me beauty wise- a perfect DIY basis!

So I knew I would paint the metal bits as no matter what I covered it with, they are the places that will get the most friction and I knew paper would rip and fabric would fray. Plus it would be a pain to cover them and not look as good. Now as I was on a mission to do this on the cheap, I raided my cupboard and found some spray paint...

Now I realize now the colour is TOO much. I had envisioned the bright green metal and some crazy pinky fabric, but when I went to ikea to get the fabric, I didn't like it in person. The spray paint had been hiding in my cupboard for months so I figured WHY NOT?! Oops.


I spray painted all the metal bits (to the horror of the gardienne- the person that maintains the apartment buildings and sorts the mail etc). She made me leave so I had to continue in the "cave" (aka basement). 


As you can see it was kinda messy- especially when you are doing it at top speed to avoid getting caught again... I was still working in shared space- here is actually the exit to the courtyard. Dangerous territory....!


Next step was to take a book I had found and rip it up- I decided that this is what I would use to cover the inside.


I then proceeded to very messily paste the inside with PVA glue and plaster the inside with the book pages, every which way until the whole inside was covered.


Taken from my instagram here.

As you can see once I had covered the inside of the whole thing I took the front cover of the book and stuck that on too. I liked the addition of the red, I think this also influenced my later change of colour.


When glueing the pages down you do have to be a little careful to make sure you smooth out bubbles and that its ALL stuck down. I went over the edges and over the top with the glue to make sure it was thoroughly fixed as I did the whole inside.


I did go over the edges a bit, this is fine because you can just cut it off later.

Before doing the inside front I had to fill in the holes left by the handles. To do this I cut out some card to size and jammed it in the hole and then taped the whole lot up like this.


Then I kept glueing and papering until I had this:
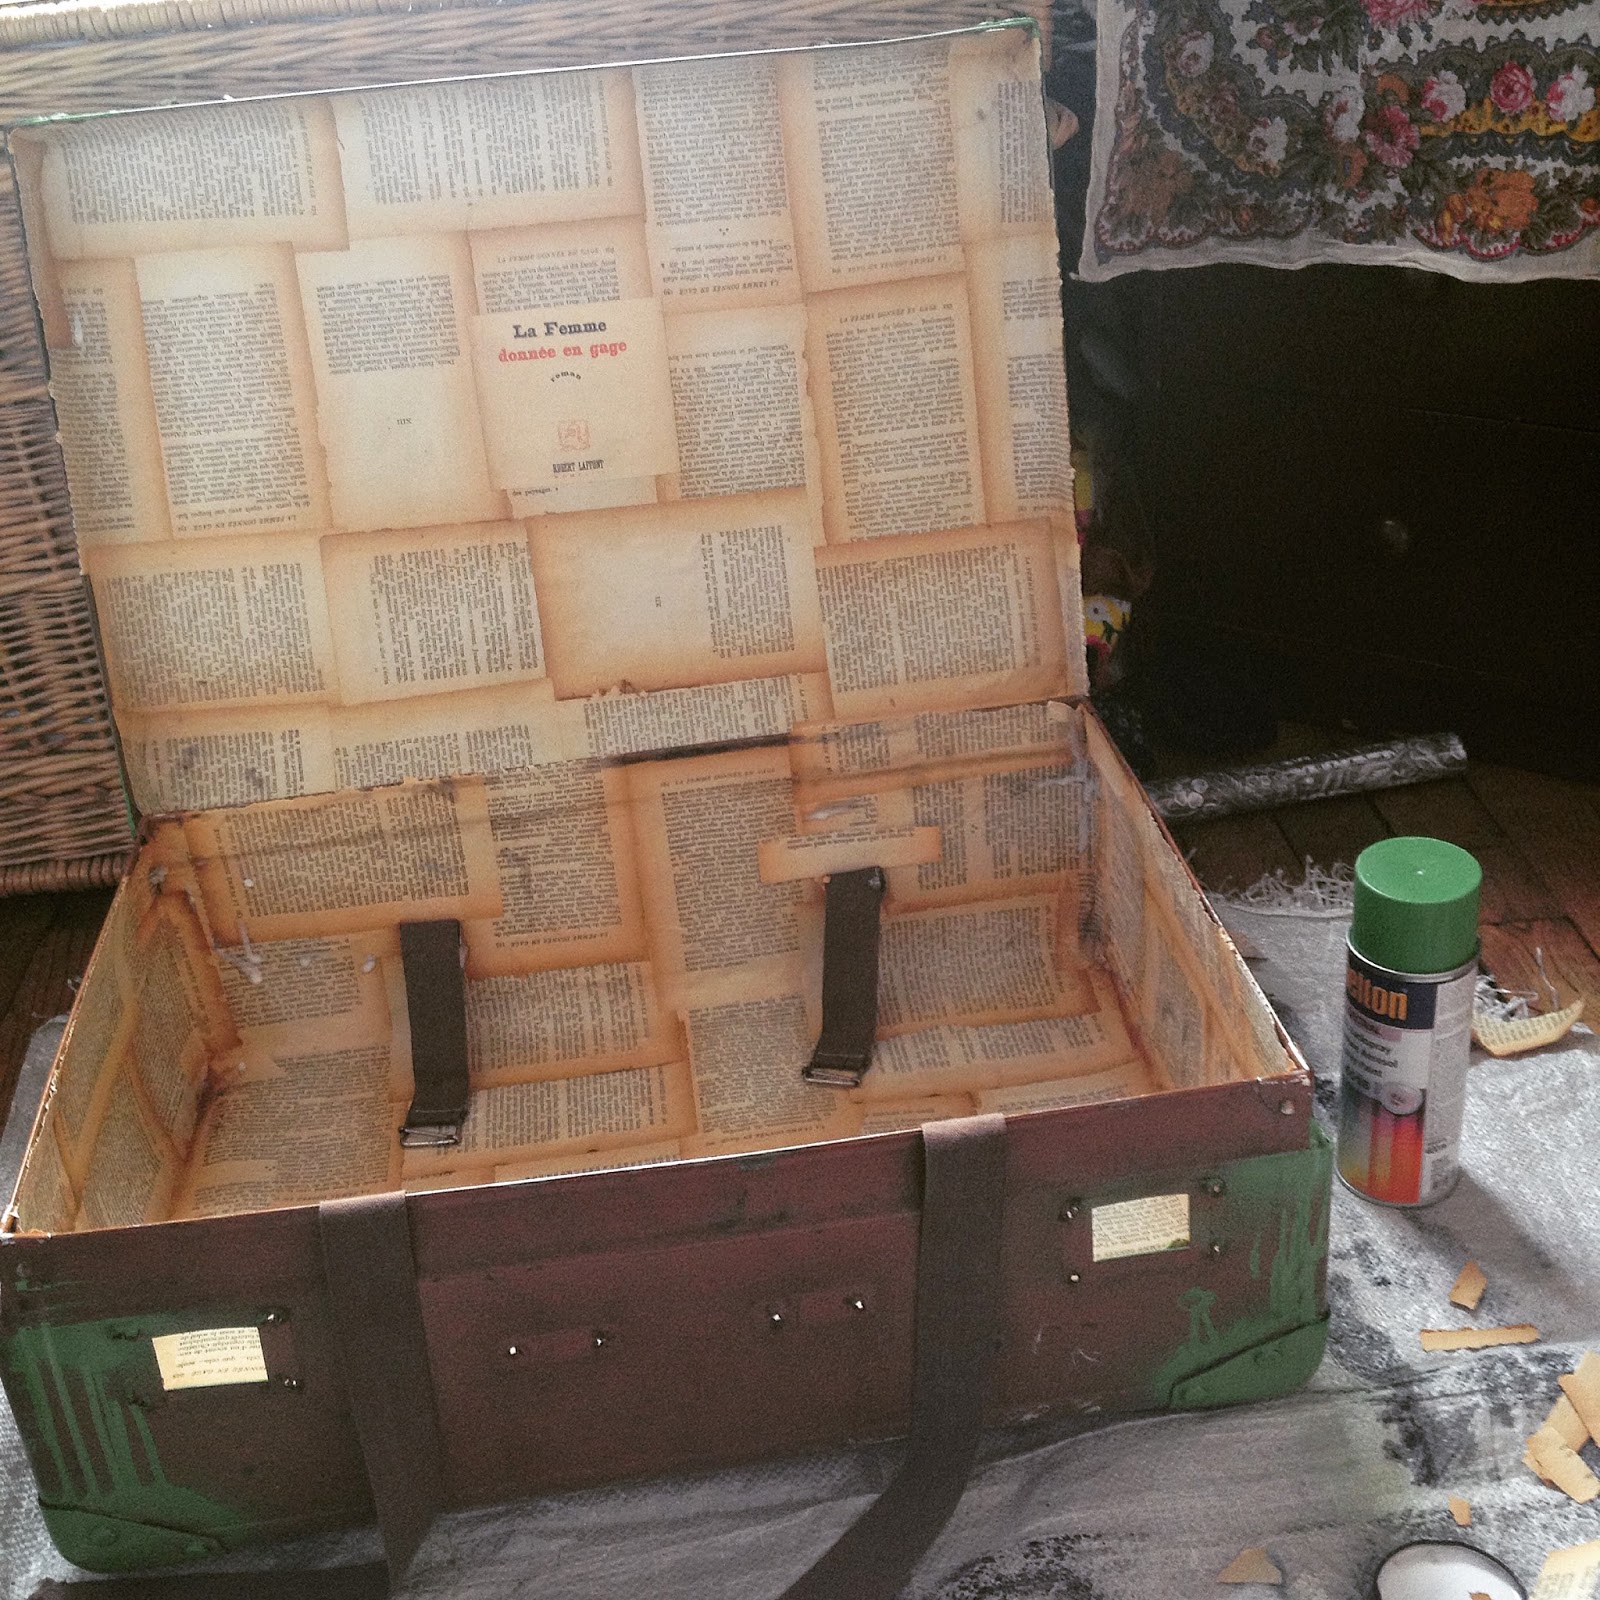

I left it open for a day or two, at which point I went to Ikea to look for fabric, failed and got some wrapping paper instead (for 1.99!). Gah. I also decided that I really did not like the green and decided to beg borrow and steal acrylic paint- I struck gold with some red that a mate kindly lent me.


So I laboriously went back over the whole thing...
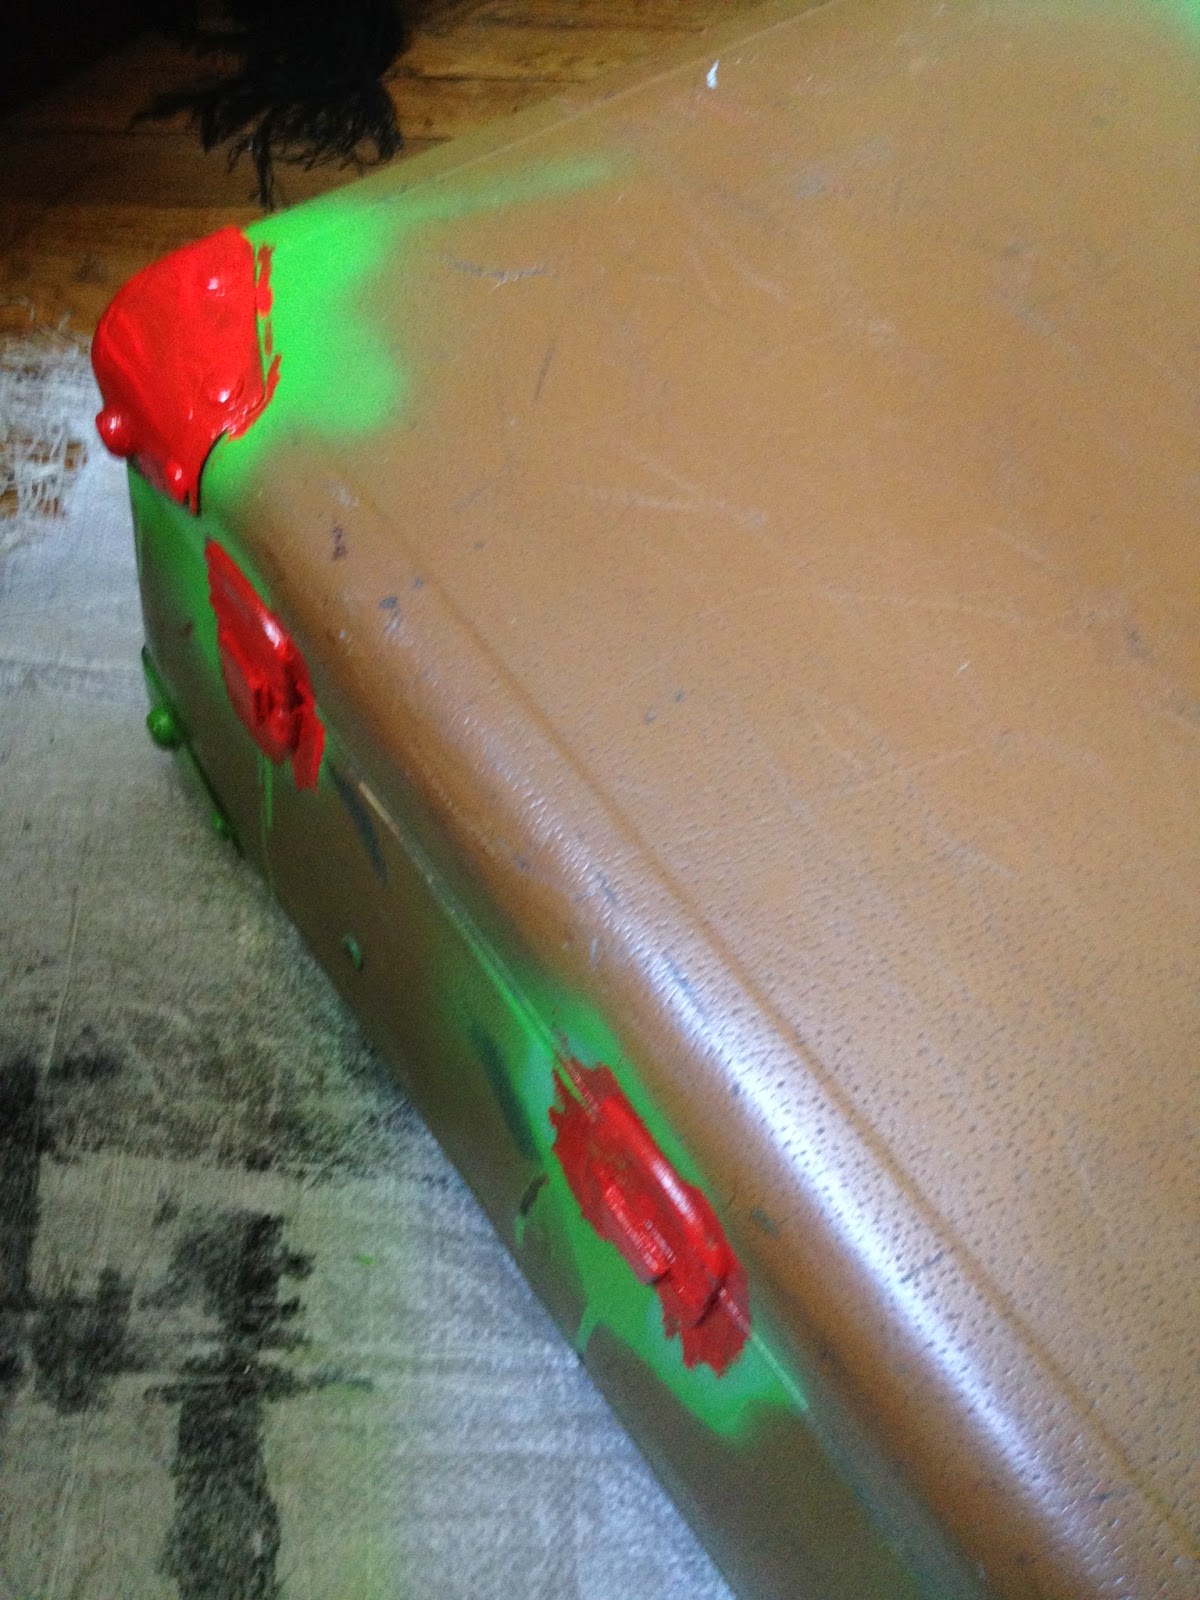

I had to do three coats of red and had to do this in stages. Do one side, let it dry, repeat. Repeat. Turn it over and do the whole lot again. Not fun. By this point I was really fed up of the mess. My room had become an obstacle course and getting to my wardrobe was hard work.

So once that was done I set to work covering it. This was NOT easy. I mean really not. It was really really fiddily. I spent a lot of time staring at it thinking "what. how. huh?" and in the end decided to stick it down and then cut around the metal. It almost worked.


I decided fixing the edges with double sided tape to hold it in place as I cut was the best bet. So here  just used double sided tape (two differing widths- this is for no reason, its just what I had).

Then I lay the paper over and smoothed out, pressing on the tape to keep it fixed.


THEN CAME THE FUN. HAHA. NOT....


I was feeling with one hand where the metal ended and with the other cutting the paper away. It was hardly accurate.


As you can see I messed up a lot and so resorted to patching it up.

I wasn't happy I had to do this but as the pattern is so busy you can't tell unless you look for it.


For the sides I did a similar thing.


Except when it came to the hinges at the back.


As you can see I cut slits to get the paper on easier, I then did the same cutting technique as before.

I then turned it upside down and measured the width of the gap between the metal and cut a strip long enough for the sides and bottom.


I lay it over and glued it down.


I was so sick of it at this point...


But I kept going, glueing, cutting etc.


FINALLY. For the inside edges I folded over the paper to that there was a rim all the way around (inside) of the wrapping paper, which you can see if you look carefully.


My chosen method of drying!

I then had to do all the final trimming and touch ups where I had chipped the paint etc.

And then came the mistake. 

I wanted to varnish it, and found this in the cupboard and so varnished the inside bottom. Oh dear....


It is still really patchy... I am not happy... So I don't really know what I will do. I have however, for now, decided to leave it as I am going back to the UK next week and can't leave my room in such a mess whilst I am gone.


I think overall it was a success. It certainly looks good from a distance. But right now it has no protective coating, I think more research is needed. Had it been just fabric I would have left it and called it done. It did take a LOT of time, however I spent virtually nothing as I had or knew someone who had everything I needed. I do think thicker paper would have been better though as it didn't hold up to lots of glue well. It was a battle of sorts but for now its done. And I am content. 

Now to clean up that huge mess...!


Saturday, 11 April 2015

Gold RImmed Stamped Clay Bowls


I saw this blog over on pinterest for stamped clay bowls and really loved the idea, I also needed to make something for a belated mother's day present for when I head back to the UK in the Easter hols. So I thought this would be perfect. But in my normal haphazard style, mine are of course far from the perfection of Gathering Beauty's bowls. But I still love them and think my mother will too.

WHAT YOU NEED


Air Dry Clay
A Stamp of Some Kind (mine was a clear plastic one but you can use wooden mounted rubber ones too, they can also be any size, you will just need to stamp more).
Ink
Gold Cermamic Paint
Rolling Pin
Knife
Sandpaper
Paintbrush
White Spirit


First of all I made a mount for my stamp because I did not have one of those plastic blocks big enough, and I was trying to do this on the cheap.


You can see it here inked up and ready to go.


Then get a chunk of clay, knead it then roll it out until the desired thickness.

There are two ways of going about the next bit, either you can stamp the rolled out clay, or you can cut it to shape first then stamp it. I found doing it the first way (as the other blog did), meant that I had scraps of clay with ink on it, thus making it more or less useless to use again. So I decided it was better to cut it to size first.


So put a bowl over it that is the desired size and cut around with a knife.


Voila!

Now stamp it. Remember to ink up your stamp thoroughly each time and apply equal pressure.


You will then have a stamped disk, as you can see my ain't perfect (but it is part of the charm!)


Then press it carefully into a bowl. Do this evenly and gradually to avoid distorting the pattern.


Keep going until you use all your clay and all your bowls!

You then need to leave them to dry, I did this before work and by the time I came home (7 hours later in my very warm apartment) they were ready to turn out.


If you look carefully on this one you can see the rim is whiter where it is dry and the rest is still grey. It is not quite ready to be turned out.


This is how they looked when I left them to dry over night.


Once totally dry (about 24hours later) I gave them all a good sanding and evened out the rims as much as I felt like.


See, Much neater.


I then painted all their rims gold.


Some of them however had traces of blue ink on the bottom so I thought I would paint some of the bottoms gold too. Also as I am giving them as presents in sets of two, I thought this would make it more exciting!


Two coats later and I am done.


I am quite happy with how they turned out and will deff do this again. It was good fun and fairly cheap. And I think they look beautiful!

Next time I would like to get another stamp and colour to mix it up a bit. I nearly went with another colour because this is the same as the colour Gathering Beauty used, but its also the colour of my current bed and future bedroom AND my other choices of red or purple would not have been as appreciated by the intended recipients. Choosing another colour purely to be different seemed more daft than using the same! But if it had been just for me I would have done red for sure. 

Here is a pretty song


Sunday, 22 March 2015

Making a Thrift Store Dress BIGGER


So the other day when I was running an errand in a district of Paris I do not know that well, I spied a rather unusual (for Paris) thrift shop. Yes there are vintage shops all over Paris, but they are not like England's second hand shops where it is possible to get true bargains. And this wasn't really a shop. It was more like a garage with the front open and its wares spilling out onto the street. This dress was hung at the front and I immediately fell in love. 

It may not be something unique or amazing but I really liked the shape and I am a sucker for dark blue dresses. I thought it looked a bit small but I figured it was elasticated so gave it a try. I hid behind some boxes and did my best to get it on. No way in hell. TOO small and there was no hidden zip. I was sad, "C'est trop petite pour moi". I handed it back and walked off.

But I KNEW it would look good on me and it looked like maybe it COULD fit if maybe I could do SOMETHING to it. So I went back and offered her four euros for it. I was determined to make it fit.

With the aid of some Joni Mitchell I cracked on.


What I Did:


As the main problem was getting it on over my head and it being too tight across my chest when I eventually did get it on at home, I decided I would simply remove the top half of the back.

So I marked with some pins where I thought I would cut down to. I thought about where my chest was and made sure it was below that (for maximum give).


I then cut this panel away, leaving 1cm all round of the elasticated panel to use to make new seams. 

I put the closest book to hand between the front and back so you can better see the cut. As you can see the back opens up MUCH more.


I then pinned it all around which was most fiddly on the elasticated section.


Next I stitched all around using a zig-zag stitch. I used zig-zag because I only folded the fabric over once and wanted to make sure it would not fray at all and thought this would be the most secure way of doing it.

I tried it on and could now get it over my shoulders and chest easily. But I wasn't done...


Last week on my way home I found this rather ugly lampshade on the street, I had an idea for the wire frame so took it home. But also noticed it has some rather lovely lace and ribbon attached. Looking at the dress I decided that the ribbon would make a great tie for the top. 


So I took the ribbon, cut it in half and sewed half to each side about an inch from the top. 


And it was done!


I am pretty happy with the result. I am really too broke right now to buy new clothes so this was perfect. The whole project cost 4E, that is it. I borrowed the sewing machine, and salvaged everything else. I am tempted to sew three old mother of pearl buttons I have in a line on the front to further personalize it.  But I am enjoying flouncing around in it the way it is (I have already rocked it about twice for a dinner party and a walk in the woods). Proof that with some imagination the perfect dress can be really REALLY cheap.

I could have taken the whole back out and put eyelets in and laced it up corset style... I very nearly did. But that meant buying eyelets...! This was better.


Sleeping comfortably in my new dress in some French woodlands (hiding from the Paris smog). 

Friday, 20 March 2015

Experimenting with Colour and some Random Doodles

Like most creative people I seem to acquire odds and ends of all kinds, I have only been living here a couple of months but this workspace sort of organically grew of its own accord. It was just a desk with a printer on it when I moved in, but I find it hard to live anywhere without leaving my paw prints EVERYWHERE!

My workspace with the shelf I "made" from a piece of wood I found (with striped washi tape stuck to the side) and sat on books and vintage tins.

I have always been a doodler. As a teenager it was Manga cartoons (I was born in Tokyo and this was my way of connecting with that I think!), but of course this changed and mellowed out with age. I have dabbled a bit with watercolours, but mostly use promarkers and biros or fine liners for my drawings. But after watching a few videos on youtube about Distress Inks (which I use on my Etsy creations, see here), I decided that wonderful things must come if I start combining all three. So I started experimenting... Here are some of these experiments.


I have mixed feelings about this. Its a bit too yellow. But I was listening to a song, Psycho Cinderella by Soan and it made me think of mushrooms, not really clear why but it did. Here, have a listen...


Maybe it is all the singing about butterflies smoking that made me think of Alice. Who knows. But it seemed to make sense at the time. And it meant I could have a go at using distress inks for solid backgrounds as I really hate drawing on white, its so much more stressful than on a texture. I just sort of swiped the pads over it, threw some water at it and let it dry before drawing on top then painting. I used the markers a bit too... Was ok I guess.


This was the excess ink from the picture above, I used some paper to press over the top and pulled it away and was left with this, which I thought had beautiful potential...! It did!


This was done on one piece. I love how the ink shows through on her skirt and gives the background more interest. It was inspired by a picture by Saatchi, only I made her a red head because I am a little obsessed to say the least. Also she has no hands. I can't draw hands.


I started this too. This involved the gouache also. And some gold ceramic paint. It kinda moprhed....


Maybe it needs more something. I am not sure. But I like some of the ideas here. Like the dots texture in the top right hand corner. The top half gives me more ideas for sure.


Here is my new little friend. Inspired by a Supakitch tattoo. I have a bit of a love for Supakitch's art, I would love to have some in my room, this is the closest I get for now. The moon is water colour and the rest is promarker. I am actually thinking of having this printed onto a case for my phone. Anyone that knows me in real life will know how I have a tendency to personalize EVERYTHING. Whether it be my jacket, backpack or laptop... It all has a OrchidsHeart touch to it. 

I have plenty more sketches that are a WIP, and some older ones too.... Maybe I will share more at some point. We shall see.


Tuesday, 10 March 2015

Naturally Revitalizing Your (Real or Fake) Ginger Hair

Ever since I was a kid and saw Practical Magic I have lusted after Nicole Kidman's red hair (incidentally I think I sort of also wanted to be a witch but hey...!). I mean seriously her hair is gorgeous...


And of course dancing with midnight margaritas is always a plus (though as a kid the crazy dancing sufficed).

Weirdly even my mother wanted a red-headed daughter, but what with her and my father having almost black hair this seemed a somewhat fanciful wish to say the least. To cut a long story short, and a lot of attempts using chemical auburn dyes in my early uni years I kinda gave up on the "dream" but then I discovered henna. All I can say is my love affair started and many people now can't imagine me any other way. In fact often people are shocked when they realize I am a fake...! Including an authentic ginger friend of mine (apparently I have betrayed him with my faux gingerness).

Henna is really THE best dam way to get natural looking ginger hair, I have been faithfully using henna for I think three years now, I am kinda hazy as to when I started.... However I hate dealing with roots, and the fading. Though hennaed hair doesn't root anything like chemical dyes and it kinda blends in when it grows out, I still hate it. It gives me away! IF people are observant. And it is always a much better colour in the sun, inside when the light is dull my hair is equally dull and I am always battling against this. I feel like my hair is reflective of my personality, or at least it should be and therefore it can't be dull...! 

Sunned ginger locks.


So I was inspired by this post and decided to make my own doctored version. Not only did I feel a little like a Nicole Kidman witch, it really worked after one treatment and was far less messy than a henna root job. I THOROUGHLY recommend. It brightened my hair, lightened it a bit, and made my roots disappear. 

Winter dulled ginger (and this is a good day). It just ain't bright enough pour moi.


Natural Henna Hair Mask

Ingredients

This can be played with depending on what you have in your home.

Chamomile tea
Olive oil
Honey
Henna (I use Lush's Caco Rouge because I know I can trust it not to have any funky copper deposits or whatever).
A natural conditioner, in France we have a brand called Nectar of Nature that seems to be less offensive then usual brands)
Aragon oil (optional)

A JAR OF SOME SORT (my conditioner came in a tub not a bottle so I am recycling that as there is not a lot of it left anyway).

First take a square or so of henna and cut it up as fine as poss (the hot water never dissolves it totally).


Then pour half a cup of boiling water over the tea. I used two because I think packaged tea is a bit weak. If I wasn't so broke I would have bought a packet of actual chamomile flowers from the natural store (Bio C Bon) and brewed that up, but that was 5euro and this box of tea was 1.50, I figure there will deff be a difference in quality but I am broke so hey ho....

Give the gloop a good mix. 

Then add the extras. A good squirt or two of honey. A glug of oil. A few drops of aragon oil. And then mix in the conditioner until it hits the desired consistency. I ran out of conditioner as all I had left it what is you can see in the tiny mug.

It ended up looking like this:


(I apologize profusely over the picture quality, I am having camera issues right now).

On a casual sunday afternoon whilst I was drawing, I dunked my head under the shower head, towel dried it, then coated it in this mixture and then covered it in cling film and let it sit for about 30min before washing it out. 

Deff was a good quick perk up! I think I might put some more conditioner in though when I get around to buying more. Or I might just use this, as its impossible to OD on henna in my eyes.


I ended up transferring it to a prettier container too. I am gonna coat the label in modge podge so it holds up better,


I am hoping that this mixture will give me "in the sun" ginger hair all year round. And with its hair lightening ingredients (chamomile, honey, olive oil) it should gradually build up to achieve just this. But if I get bored of waiting I might just coat my head in honey and do it that way! 

Seeing as this is generally stuff I have sitting around (I bulk buy my henna in the UK because the taxes here on that stuff is insane) it was basically free at the moment I decided to make it. If you are a henna head too, just keep a square back next time so that you can mix up a batch of this to keep you going until you henna again (I never use more than three squares at a time now anyway).

****

Check out my Etsy store here.